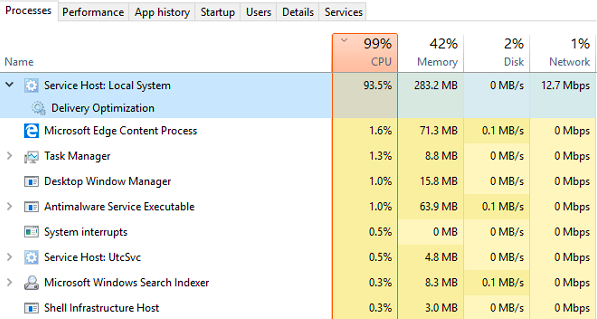
Have your PC also gone into a problem which you can’t handle? See, the high disk usage is normal. You are not much careful and hence, your disk ran into some over-use. Here is the article to help you out from such a situation. Read the full article to know how to fix Service Host Superfetch High Disk Usage Issue?
What is Service Host Superfetch?
Before getting into the solution for the real trouble, let’s get to see what exactly is Service Host Superfetch.
Service Host is a bundle of System Processes which operates automatically through the system. It includes processes like Windows Auto Update and others. This takes up a huge disk, memory, RAM and even internet data.
Superfetch can be described as an innovative memory manager which analyzes the memory usage over time to optimise the memory content. It was introduced in Windows Vista. This technology allows the Windows OS to manage random memory so that your PC and system and the apps can perform effectively.
The Real Issue
It is true that Superfetch helps the device in a lot of ways. It makes must-load apps function more efficiently. But at the same time, it leads to a bit of a problem.
The amount of space it takes up and the fact that it tends to run in the background all the time puts extra load on the computer. It sometimes creates problems for itself and loses control on when to stop. It even gets in your way while playing games and decreases the Frame rates.
How Can You Fix Service Host Superfetch High Disk Usage Issue?
Well, these situations are not in your control. You might be worrying about where to see if all this happens. Don’t worry, we will help you. Here are the 3 methods which will solve all your issues. Look at them carefully and perform as directed-
1. Clear The Junk
This is the easiest way of solving the High disk usage issue. For those who have experienced the problem recently, this is the way you must follow.
i. First of all, download a free tool made for this purpose – EaseUS Free partition Tool.
ii. Launch the application.
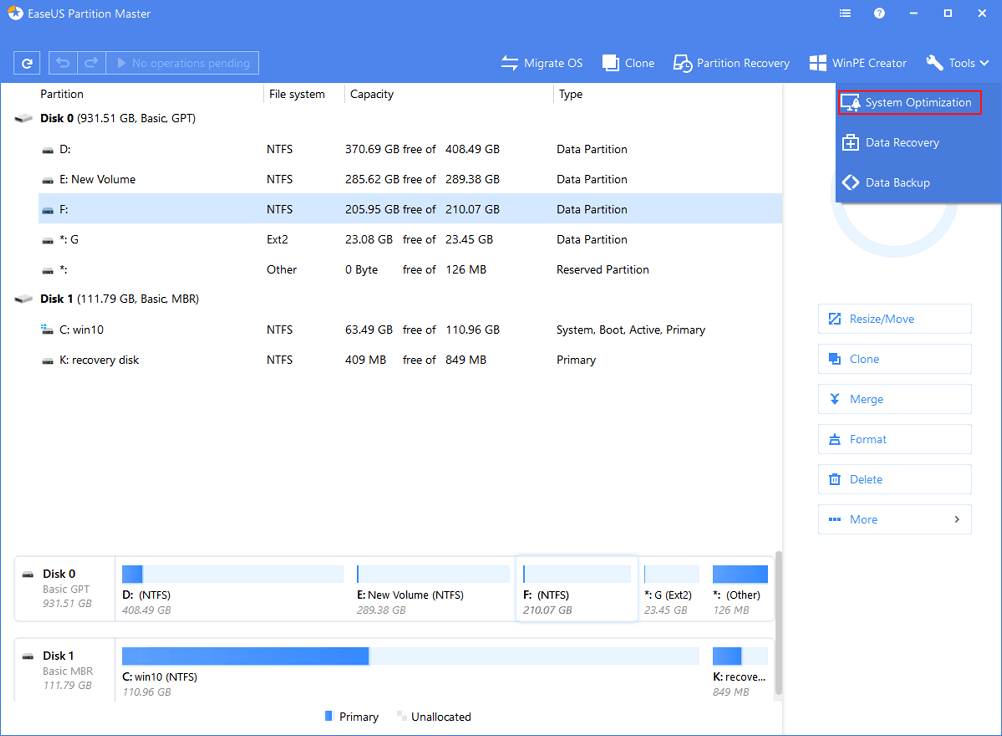
iii. Go to “Tools>System Optimization“.
iv. Tap “Junk Files Cleanup“.
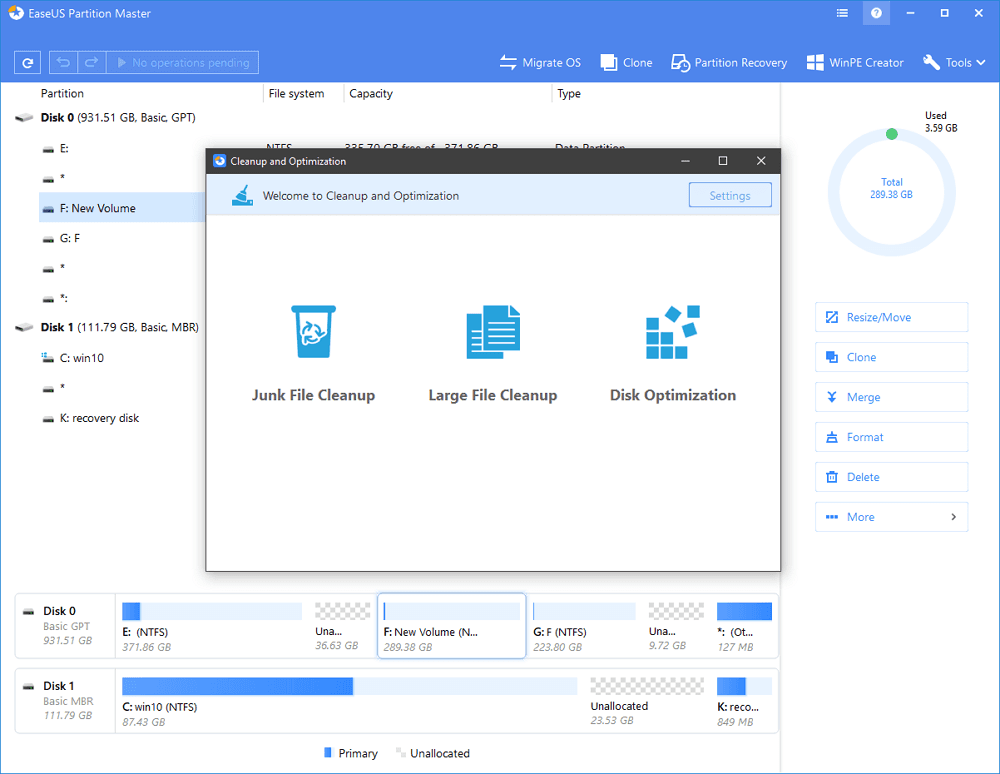
v. Click “Analyse” to let EaseUS find junk files on your PC.
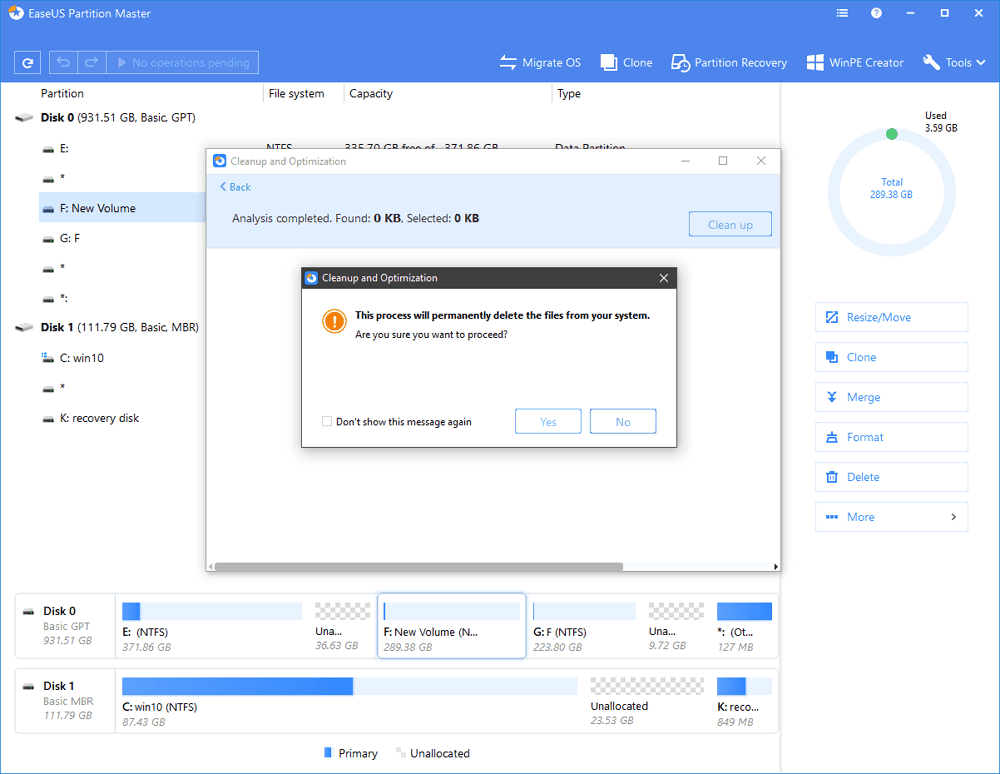
vi. You can the junk files and click Clean up. Click on Yes to confirm. All the files will be permanently deleted.
2. Fix With Windows Troubleshooting
Running a troubleshoot on your Windows device is another solution for the problem. Go through the following steps, you’ll have a better idea-
i. Go to the Control Panel of your PC.
ii. Click on “System and Security“.
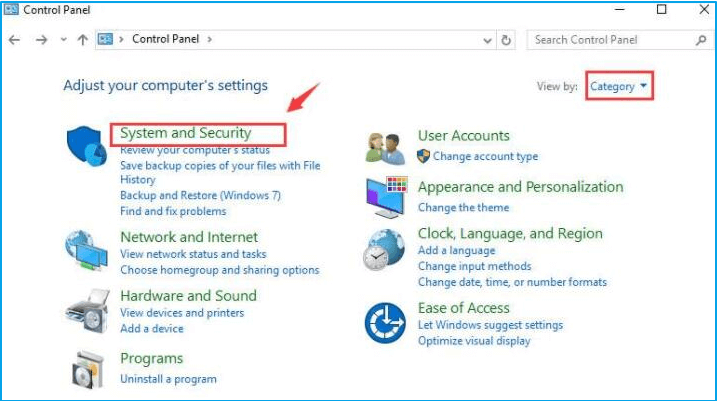
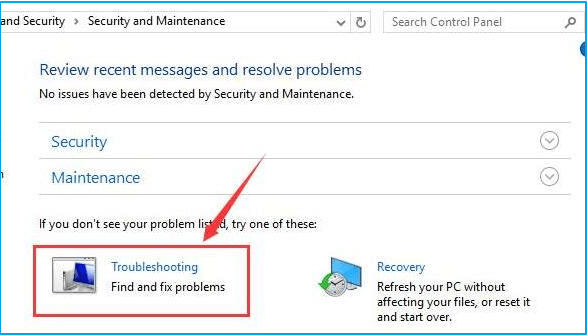
iii. Click “Security and Maintenance“.
iv. Find Troubleshooting and click it.
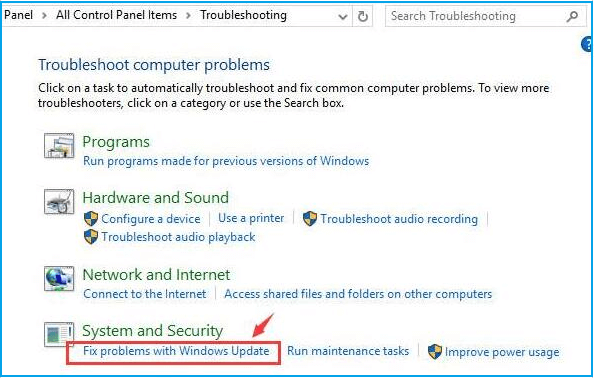
v. Click Fix problems with Windows Update.
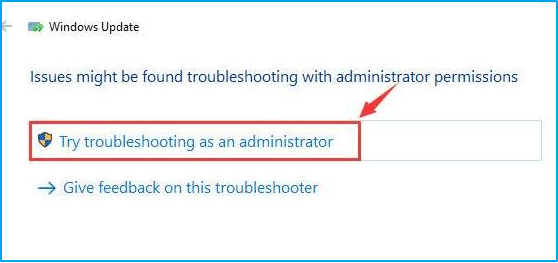
vi. Click Next and then click “Try Troubleshooting as an Administrator“.
3. Disable the Superfetch
If the problem is serious enough and you can’t find a solution, it is time to stop the Superfetch altogether to deal with the problem.
There are 2 ways in which you can do that, both of them are listed below-
Method 1 – Stop Superfetch With Run Command
- Press Windows + R and type “Services.msc” command.
- Find “Superfetch”.
- Go to its properties.
- Press “Stop” to stop the Superfetch services.
- Superfetch services will be disabled. Click OK.
2nd Method – Disable Superfetch Using Command Prompt
- Click Start and got to the command prompt.
- Right-click and click Run as Administrator.
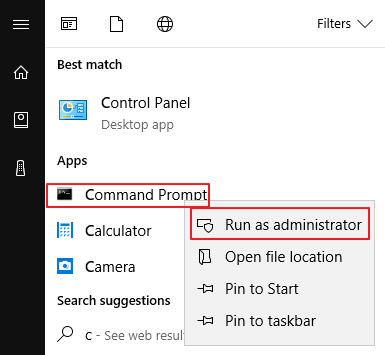
- Type this command – “net.exe stop Superfetch” and press Enter.
- Wait for a minute to see if you can see the changes in your device’s performance.
- Your problem should be solved at this point, if it is not, then run a disk check.
- To run a disk check, type the command- chkdsk.exe /f /r and press the Enter key.
- Type Y to confirm the disk check.
Final Thought
So, these were the 3 easy methods to fix service host Superfetch high disk usage issue. We know that this problem can sometimes be a great menace. So, just relax and follow these methods for the solution of your problem. If anyone of them doesn’t work, then try the next one. It is advisable to keep your computer free of junks regularly to keep the device away from all such issues.

