Blog Page 137

Basics Of File Size Conversion & KB v/s MB v/s GB Explained In Depth

Let’s take real time example to explain about files. We all know how files look whether it is digital or a physical the common thing in these both types of file is that it contains data and have a size too. A physical file that we carry normally the ones with paper pages can be expressed in size with a number of pages. But the digital file that we store in our system represents term size in terms of bits and bytes.If you have confusion in the understanding difference between bits and bytes and that will be explained too.

file size

Understanding Basics Of File Size Conversion

So, File can be expressed as a collection of data which can be a collection of alphabets, numbers, symbols or some mathematical formulas and expression whose size is expressed in terms of bits , bytes, kilobits, kilobytes and so on. Which is the amount of space it consumes in filesystem.

Understanding Bits & Bytes:

Defining Byte then we can say that 1 Byte contains 8 bits which mean a Byte contain a sequence of 8 bits. 1 Byte is enough to represent one alphanumeric character. A single character consumes at least 1 Byte which equals 8 bits.

1 Byte = 8 bits

If you are still confused in understanding bits or Bytes then try this. Bytes is always represented with uppercase “B” and bites is represented with lowercase “b”. So when you are reading these terms just recognize uppercase and lowercase of starting letters so you can become more confident about understanding file sizes.

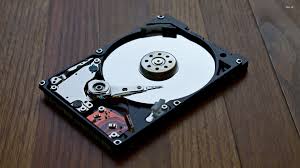
File Size Of Computer Hard Drive:


computer-hard-disk

Nowadays hard drives are measured in GB(Gigabyte) and TB(Terabyte). So it is easy to know how much amount of space your hard disk carries actually. We prefer at least 1 TB of the hard drive for storing all our stuff like music, movies, files etc. But if you have 1 TB of hard disk then you will not get complete 1 TB of space on your disk you will get 995 GB of space because some portion is reserved for hard drive driver. And same goes for some peripheral devices like external hard disk and pen drives so you don’t get the exactly specified amount of space but some less.

Understanding KB, MB & GB:

Now comes the main understanding part. Most of us get confused in kilobit & kilobyte , megabit & megabyte also gigabit & gigabyte. There are so many terms that make you go crazy so , I will explain you this in a very detailed manner and once you understand you can easily sort the differences between KB, MB & GB also much more.

1 Kilobit(Kb) = 1,024 bits

1 Megabit(Mb) = 1,024 kilobits (Kb)

1 Gigabit(Gb) = 1,024 megabits (Mb)

Note: Observe the difference between kilobyte which is represented as “KB” and Kilobit which is represented as “Kb”.

Similarly let us see for kilobytes(KB) , megabytes(MB) and gigabytes(GB)

1 KB = 1,024 Bytes

1 MB  = 1,000 KB

1 GB = 1,000 MB

Even terms like Terabytes(TB) and Petabytes(PB) are very common in terms of space now. So, we can also understand differences between them.

1 TB = 1,000 GB

1 PB = 1,000 TB

KB v/s MB v/s GB:

Since we have already discussed the basics of kb,mb & gb to get you understand in a brief let us have a look at the table for more description.

kb vs mb vs gb

Measure Of Data Transfer Speed:

Data transfer speed over a network which can be a LAN or WiFi is calculated in terms of bits per second. Higher the value of kb more data can be transferred. Which ultimately increases the speed of a network.

1 kbps (kilobits per seconds) = 1000 bits per second

1 Mbps (megabits per second) = 1000 kilobits per second

1 Gbps (gigabits per second) =  1000 megabits per second

To calculate download speed:

Download KBps speed = ((kbps valus * 1000)/8) / 1024

So if you want to convert bits to bytes then just divide it by 8 and rest all we have already covered. This is the basic of file conversions. Once you go through them they are very easy to remember since the terms are limited which expresses size.

How to Watch Live TV Shows & Movies On Any Android & iOS Device

0

You don’t always need a television to watch LIVE shows or any entertainment stuff. If you have any android device which can be a phone or note or a tablet then you are already having a TV in your pocket all you need is an internet connection to your device and also an app which will convert your phone to a TV. If you are stucked up in office errands and you think you are going to miss your favorite show since you are not at home or else if you are travelling or into some sort of situation where you can’t watch your favorite show and dying to watch it live then no worries almost all of us have android devices with us all the time and with internet connection too so just install these apps and nothing more to do. So now do not miss any of your shows. Keep yourself entertained with these new apps which will make your any android device turned into a TV.

Watch Indian Live TV Movies & Shows On Android & iOS

  1. YUPPTV

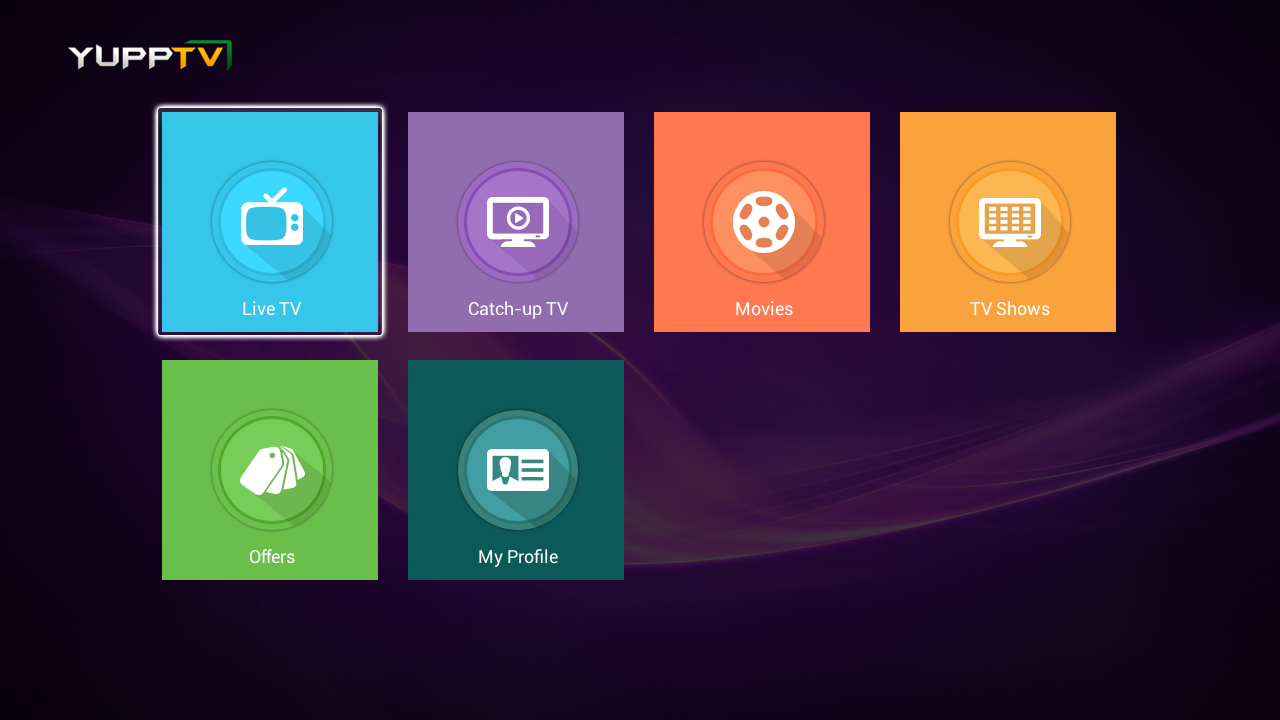
live tv for androidYUPPTV is the app for you if you wish to watch the shows that you have missed. It is great platform to watch live TV shows no matter which genre it belongs to. It is very light app so it wont make much of the burden on your android device. Its UI is simple so you don’t need to go through any kinds of tutorials to understand its working.

Steps to install YUPPTV on Android:

  • Go to play store.
  • Type YUPPTV in a search bar.
  • Once you find it on your screen click on install and accept the terms.

yupptv channelsKey Features Of YUPPTV:

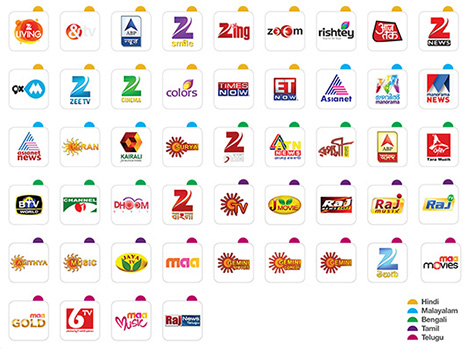
  • It has a range of 200 channels you can watch.
  • It can be watched in all regional languages expect for some channels like zee & star.
  • It is totally free .
  • It will support even 2g internet connection.

2. HOTSTAR (Android, iOS)

hotstar showsHOTSTAR was fist app  to join the race of online television on android devices. Another awesome android app where you can watch unlimited TV shows and movies. Even you can watch LIVE TV on it in high definition. According to your internet connection, you can set the video quality. It works well if you have at least 3G connection in your device. All you have to do is install it from an app store and get started. There are some categories where you can watch stuff in premium that is you have to pay for it mostly movies.

Key features of HOTSTAR:

  • Watch unlimited movies and shows in HD quality.
  • Supports 3G connection and above.
  • Set your favorites by creating the favorite list.
  • Can download videos on your device.

Watch LIVE TV Shows & Movies Of Other Countries

If you are a fan of USA TV shows and Hollywood movies then it is best you prefer apps rather then finding shows online cause some if the shows block content for some countries. So in this condition its best to go for apps. The trends for Korean variety shows and serials have also gained a hike. So let’s see which apps can get you everything you want.

  1. TubiTV (Android, iOS)

tubitvIt is great platform for watching online tv shows as well as Hollywood movies of other countries. All you need to do is install it from play store and sign up. It is completely free and you can create your favorite list. You can also set notification settings that whenever you have new episode added or any new show it will notify you. Also you can set video quality.

Key features:

  • More that 100 channels to watch live.
  • All genres of Hollywood movies available.
  • Can watch live sports including football, basketball almost everything
  • Watch serials live on your device.

2. VIKI (Android, iOS)

viki for korean dramasFor all the Korean series fan this is the best app to watch online Korean variety shows as well as Korean serials. Since the update for episodes are very fast and also you can see videos with English subtitles it has great UI too with great HD quality videos. If you want to watch videos all the time you can also download it on your device.

Key features:

  • All Korean serials updated as well as English subbed.
  • Subtitles available in many languages.
  • Watch Korean movies with English subtitles.
  • Notification for newly added episodes.

So we have seen all the apps which can convert your android & iOS device to TV. Whether you are a sports fan, reality shows fan or daily soap fan then you don’t have to wait anymore. If you are Hollywood movie and serial lover or a fan or Korean series. You can get everything on your device for free all you need is a good internet connection since we all hate buffering videos and some decent space if you wish to download videos onto devices.

How to Fix The Proxy Server Refusing Connections in Firefox

0

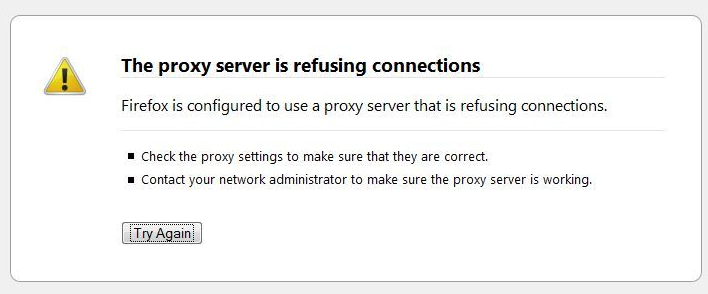
This article is dedicated to Firefox users and here we are going to discuss the most common issue that they encounter while browsing the web on their favorite browser. Most of you might have seen an error message that says ‘The Proxy server is refusing the connection‘ when you try to open a website. Now before we provide you with the steps to fix this problem, let us inform you that what is proxy server and how it affects your web browsing. A Proxy server is a server that acts as a relay between the client computer and the main server of the website that he/she is looking for. For Example when you try to access any website such as Facebook from your device, then the proxy server comes between the server of Facebook and your computer.

the-proxy-server-is-refusing-connectionsAlso Check : How to Fix Unable to Connect Proxy Server Error in Chrome/ Mozilla

Most of the time these proxy servers are used to hide the identity of your computer. People also use proxy servers to improve the speed of their internet connections while browsing websites. These proxy servers save the browsing history and cache of the website that you visit through so that next time when you open the website, it loads up quickly. However, many malicious extensions are coming nowadays such as Coupon Server and Browser Guard that modify the proxy settings of your device without your consent. If these extensions are installed on your system, then each time when you will try to load any web page using Firefox, you will receive the above mentioned error instead of the web page you requested for.

How to Fix The Proxy Server Refusing Connections in Firefox

If your system is infected by such malicious extensions that you will also get

  • Many unwanted advertisements on each website
  • Automatically your text of the web page will turn into hyperlinks
  • An adware can also get installed on the system
  • Your browser will pop up unnecessarily and recommend you to install any other software.

In this situation, you should install an anti-virus program and run a full scan to detect the virus in your computer, in case anything found then remove it.

If there are no such symptoms, but you are getting the error message while browsing the web then follow the steps given below.

  • Click on the 3 horizontal lines located on the opt right corner of your Firefox Browser to open Menu

step1

  • Select Options
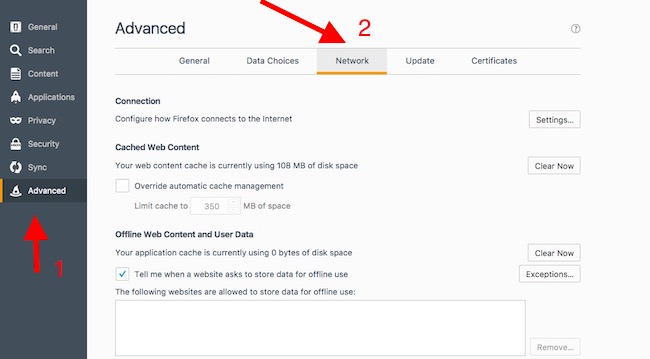
  • A new window will pop up with multiple options, click on Advance on the extreme right
  • Click on Network tab

step4

  • Under Connection section, click on Settings button
  • Connection Settings windows will appear, select No Proxy and press OK to complete the task

step6

  • Close and reopen the Firefox Browser again and it should work.

If you get this error on a regular basis, then resetting Firefox to the factory settings can help. Here are the steps to do so,

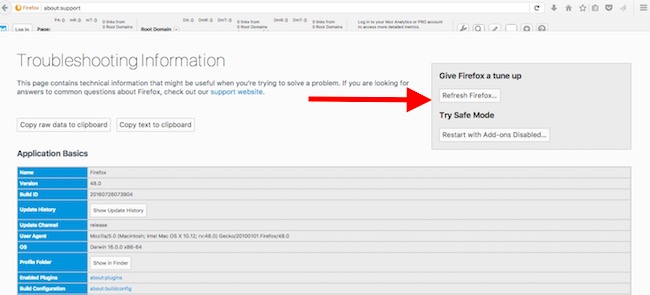
  • Launch your Firefox browser and type about:support in the address bar
  • It will bring the Troubleshooting Information page, click on Reset Firefox

option2ndstep2nd

  • A confirmation windows will pop up, click on Reset Firefox button to continue

option2ndstep3rd

  • Firefox will be closed itself and a window with the information will appear, click on

Your old Firefox Profile including sensitive information such as passwords, bookmarks, browsing history  and web form auto-fill information will be saved on your desktop. If the reset doesn’t fix the problem, then you can copy some of the old files from the old profile to the new profile of  your Firefox and if it does then remove the old profile someone else can access your private data.

How to Fix Unable to Connect to Proxy Server Error in Chrome/Mozilla

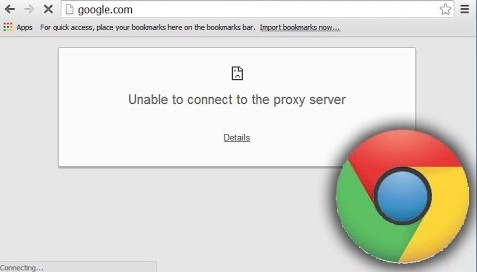
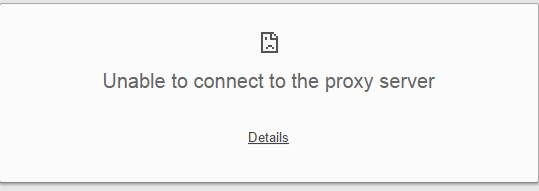
If you have a Windows 7, 8 or 10 operating system and use the internet frequently then you might have come across an annoying “unable to connect to proxy server” error which occurs when you try to load any web page using your web browser and the Proxy/IP is not configured properly or down. The proxy server works like a relay to transfer the data between the Home network and the website you are looking for.

unable-to-connect-to-proxy-server-error

There could be several reasons behind the error. For example, it occurs when an antivirus program blocks the access to the proxy server. There is also a possibility that your device is infected by any malicious software or adware. A malicious extension can also change the proxy settings without the user’s knowledge and cause this error.

Also Check : How to Fix The Proxy Server Refusing Connections in Firefox

How to Fix Unable to Connect to Proxy Server Error

Here in this article, we would give you the information about some steps that can be taken to fix unable to connect to proxy server error.

Option 1

If you are using Google Chrome browser then,

  • Click on the square icon with three parallel lines on the right-hand top corner
  • Select Settings from the list
  • Scroll Down and click on Show Advance Settings
  • Again Scroll down and click on Change Proxy Settings under Network
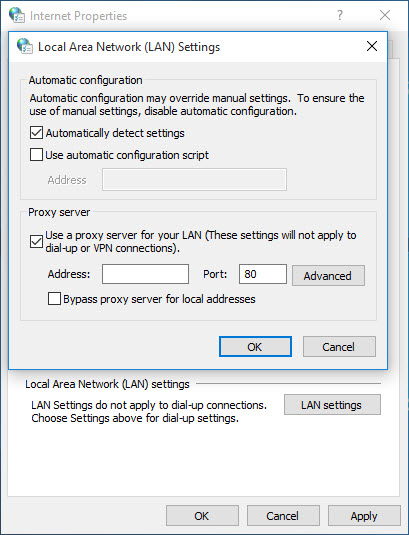
  • A new Internet Properties window will pop up, click on LAN Settings button

option1step5

  • Another box will open up, Uncheck the box for Use a proxy server for your LAN option
  • Click on OK twice to close both windows
  • Now you are back to your web browser, just refresh the page and it should work now.

Option 2

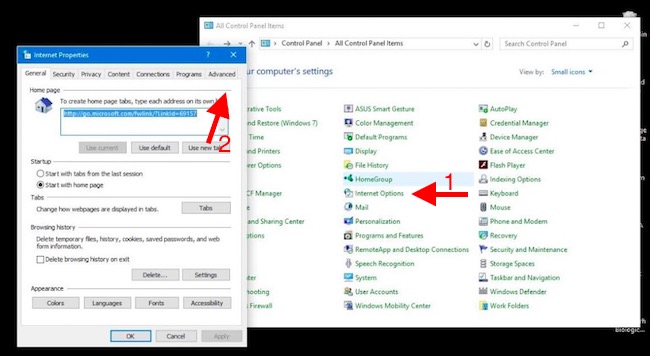
  • Go to Control Panel

option2

  • Click on drop down menu next to View by and select Large or Small icon

option2steplast

  • Click on Internet Options

You can also go to internet options by following the steps given below,

  • Launch Internet Explorer
  • Click on Tools icon on the top corner
  • Choose Internet Options from the list.

Or,

  • Open the run box by holding the Windows key and pressing R
  • Type cpl in the run box
  • Hit Enter

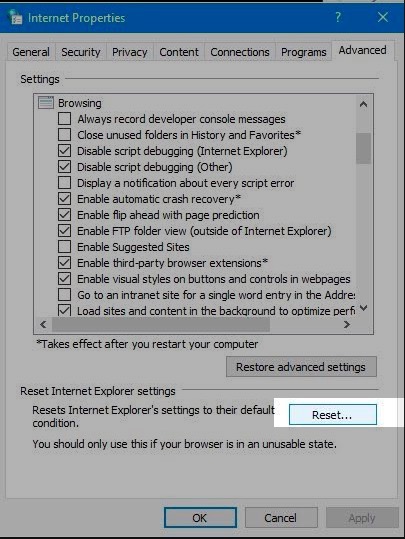
Once you use any of these methods, Internet Properties Window will pop up.

  • Click on Advance tab
  • Click on Reset button
  • Once the reset process gets finished, click on OK
  • Reboot the device

Note: Before you reset browser settings, you must close all the open web pages.

Option 3

  • Click on The Start Button and Type Tcoupon in the search box
  • If the tcoupon extension appears on the search result, then right click on it and uninstall it from the system
  • Reboot the device so that the changes can take effect

Hopefully, after using any of the above mentioned options your issue will be resolved. Share your experience and feel free to give your valuable feedback.

Loan Number and Loan Codes for Airtel, Idea, Aircel, Vodafone, BSNL, Docomo, Reliance and Uninor

1

Almost all telecom company provides Talktime on loan service. Using it you can get loan upto Rs 10 in emergency. Like you need to do some urgent call and you found that you don’t have balace or your balance is very low. In that case you can get talktime loan with these company. All companies have different codes for talktime loans. Here i am posting all Loan codes or Loan Numbers for Airtel, Loan Number for Idea, Aircel Loan codes, Vodafone Loan Codes and Loan Ussd codes for BSNL, Reliance , Tata Docomo and Uninor.

This talk time loan service is very helpful, it saved me many times. Generally we people recharge our mobile, when our balance get zero, and in that zero talk time situation, if we need to talk to somebody, we are helpless. But here i will tell you a trick to get loan from your mobile company in low balance or zero balance situation. Like talktime loan , you can also take internet data loan.

loan codes nd loan numbers

If you have zero balance then you can also try my Free recharge trick or Free calling trick and also ask your friend to transfer mobile balance. And if you have forget your mobile number then you need to try codes to find own mobile number. And you can also transfer your talktime balance for al networks.

Loan Number and Loan Codes or Loan USSD Codes

Before you take loan , i must tell you that you have to repay your loan with 10-20% extra amount. As it is named loan means you have to pay principal amount and its interest also. Same here when you take Talk Time loan , you have to pay extra. Like if you have taken loan of Rs 10 then you have to pay Rs 12-15 depending upon your mobile network. Lets now discuss How to take Talktime loan on different telecom companies or Loan Numbers for all telecom networks.

Also Check : USSd to Code to Check Internet Balance , How to Activate DND , Internet Settings for all network

Airtel Loan Number or Airtel Loan Code

If your balance is below Rs 5 , then you can take loan from Airtel India. For this you need to dial Airtel Loan Number or Airtel Loan Code.

loan code for airtel

So if your balance is less then Rs 5, You can dial *141*10# (Airtel loan number) or can also call 52141 to get a talktime of Rs 10. Which you have to repay when you recharge next time. They will automatically deduct this balance from your account.

You will also like to check these Airtel 4G data plans and Free Airtel internet trick. All Airtel USSD Codes.

Vodafone Loan Number or Vodafone Loan Code

Now you can get talktime on loan from your vodafone number. Let me tell How to get loan in Vodafone?. For this you just need to dial this Vodafone Loan Number : 1241.
Beside talktime loan you also need to check the trick to take data Mb loan in Vodafone. Also we have trick for Free recharge on Vodafone and Vodafone unlimited free internet trick.

loan code for vodafone

Or SMS CREDIT to 144.

After this you can chose from 3 loan offers from Vodafone. Get loan of Rs 5, 10 or 25. And you have to repay Rs 6, 12 and 28. Here is the list of all Vodafone USSD codes with Vodafone balance transfer code

Idea Loan Number or Idea Loan Code

If you have low balance on your Idea number and you want to do some call , you can easily get talktime loan from Idea by dialing this Idea Loan Number.

loan code for idea

To get Rs 10 talktime loan on your Idea number, just Dial Idea Loan Number : *150*10#

But for this your your balance should be less then Rs 2 and you must be an idea customer for atleast 90 days. For Rs 10 loan they will deduct Rs 13.80 from your next recharge.

To get Rs 5 talktime loan on your Idea number, just Dial Idea Loan Number : *165*5#.
For this they will deduct Rs 6 on your next recharge. But for this your balance should be less then Rs 1.

You can also Get Rs 4 loan on idea by dialing this Idea Loan Code : *444#. Rs 5 will be deducted on your next recharge.

Also Check : Trick to Recharge Idea Mobile for free. And use free high speed internet on Idea. And here is Idea USSD Codes.

Aircel Loan Number or Aircel Loan Code

loan code for aircel

Now you can get Rs 10 loan on Aircel, if your aircel balance is below Rs 10. You can get instant loan on Aircel, using this Aircel Loan Code. To get loan you need to dial *414# or 12880 or SMS LOAN to 55414.

Aircel charges Rs 2 extra for this loan service. That means you will be charges Rs 12 on your next recharge.

Reliance Loan Number or Reliance Loan Code

Reliance also provide loan service, but to avail this service you need to know Reliance Loan number or reliance Loan Code. If you are a Relaince GSM customer, you can take loan of Rs 5 or Rs 10.

loan code for releiance

Reliance Loan Number : *141#

or SMS YCR to 51234

After you dial this Reliance Loan code, you have two options of Rs 5 and Rs 10 talktime.

BSNL Loan Number or BSNL Loan Code

Happy news to all BSNL prepaid mobile customer, now you can also get Loan on your BSNL number. For this you need to know BSNL lOan code that i am showing here.

bsnl loan code

How to get Loan on BSNL ?

To get loan on your BSNL mobile , just SMS CREDIT to 53738.

Now if you recharge within 24 hours only RS 10 will be deduct from your account otherwise Rs 11 will be deduct after 24 hours.

DOCOMO Loan Number or DOCOMO Loan Code

This Talktime on Loan service is not available for DOCOMO users. So there is no Loan code for DOCOMO.

Also Check : How to carry forward 3G data to next month,

So now you can easily get loan on any mobile network. As such i have listed all mobile network Loan Code. But if you have problem with these code or if these codes does not work for you let me know in comments. Well you must share these Loan USSD codes or Loan number for Airtel, Idea, Aircel, Vodafone, BSNL, Docomo, Reliance with your friends. SO that they can also take advantage of this service.

Get the latest Loot offer to your Whatsapp or Join our Facebook Loot Offer Group.

Link: https://www.facebook.com/groups/411763222351390/

Get All updates On Whatsapp : 8104846925 [Save This number As TechnoFizi And Send a message with your Name]

How to create, reset, remove or permanently delete an Apple ID: How do I get an Apple ID?

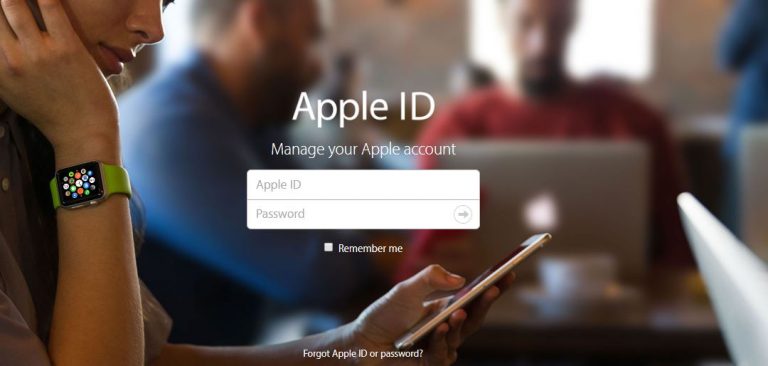
Apple ID is essential to use any kind of apple services. Apple id helps you to use Apple App store, iCloud, iMessage and its online store and forums also. Without an Apple ID, you won’t be able to use any of them. Thanks to Apple it is very to set up a new apple id for anyone.  After setup you Apple ID account you can access a waste of services, such as iStore, iCloud, Find My iPhone, iTunes Match, and Apple Music, and also make purchases from iTunes.

how-to-creat-apple-account

If you have iPhone, iPad, Mac or any other apple device, you have to use your apple id for once. Now this is important you have to use same apple id you used before but some time and also it’s very often like forgot Apple Id and Password.  So, today we are going to explain in this article how to set up apple id and how to change Apple id password. This article is Complete guide to managing an Apple ID.

How to create, reset, remove or permanently delete an Apple ID

It didn’t necessary you need and apple device for apple id. Anyone can create an apple id and use that account to login in Apple App store, iCloud. Like others free accounts have limited access to apple services like you’ll get only 1GB of iCloud space and for more, you have to pay for that. Let’s keep these things aside let’s take a look how you can create an Apple Account and what you need for that.

For creating an Apple ID for the first time, you need to provide an email address for your username. Don’t try to provide the false email id and all other information because you have to verify those details later on.  Further, you have to provide another email address in case forgot password then you can reset with that.

Let’s take a look at complete guide for creating Apple Account:-

Step 1: Open your browser (you can use any browser didn’t matter) go to this link https://appleid.apple.com/  

create-apple-id

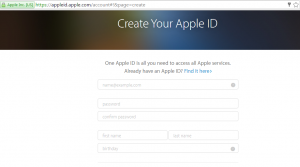
Step 2: Clink on create your apple id, after that you’ll see form and as we told you that don’t fill any wrong info because you have to verify them after creating your apple id.

Step 3: Enter your valid Email address and password to login Apple ID, Your First and Last name. The security questions you are choosing remember the answer to them. Because in case you forgot password they help you to reset your password.

Step 4: Choose your country from the list and enter Captcha and click on Continue.

Step 5: Now open your Email account which you gave. Enter the code to verify the details you have given.

Here you go your apple account have been created successfully. You can use this apple id to login into apple app store, iCloud, and Apple Form also.

How to reset Apple Id password

It’s very common that you can forget your password by mistake. But don’t worry about that you can easily reset your apple id password by using the information you provided when you created apple id. Now let’s take a look at how you can reset apple id password:

There are two ways you can reset your Apple id password by using an Email address or Answering Security.

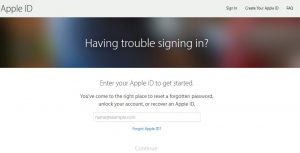
Step 1: Open your browser https://iforgot.apple.com/ and go to this link.how-to-reset-apple-id-password

Step 2: Enter your apple id and click on continue.

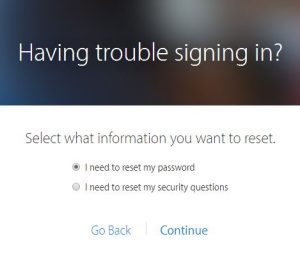
Step 3: Here you’ll have the option either you can choose to Get an email or Answer security question. If you choose the first option that is Get an email. An automatic mail goes to your email id open that mail and clicks on the given link and it will reset your password. Now if you choose second option Answer security question then.

reset-apple-id

Step 4: It will ask you birth date and after that, you have to answer questions that you created when you made your account. If you answered them very well then you can choose your new password and click on reset password.

Here you go now you can login into apple id with your apple account with the new password.

 How to recover Your Apple ID From Email Address

If you didn’t remember your Apple ID, then you can also recover it from your Email Address.

Step 1: Open your browser and open https://iforgot.apple.com/ 

forget-apple-id

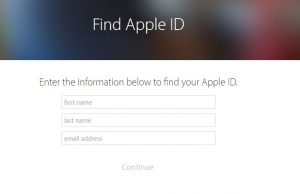
Step 2: Enter your First and Last name also Email Address you may have used previously.

Step 3: Click on next and it will tell your Apple ID, now you can use it for login.

Delete Apple ID from your iOS devices

Now in case you want to remove your Apple ID from all of your Apple devices. You need to follow these steps for each Apple iOS device (iPad, iPhone, and iPod touch) using your Apple ID:

Step 1: Open your browser and go to https://appleid.apple.com/#!&page=signin

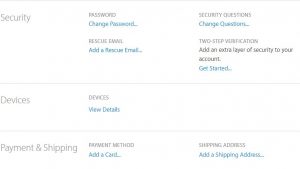
Step 2: login with your Apple ID and scroll down and tap/click on Devices.delete-an-apple-account

Step 3: Tap on each Device and choose Remove From Account.

Step 4: Tap on Sign out and Delete from my iPhone. if there is more than one device then you have to do one by one. By doing this your apple id is successfully deleted from all the device.

Here you go now you know how to create apple id and reset apple id password and delete an account from any apple account. Now you don’t need to worry about when you forget your Apple id and password. Share this article with your friends so they also get to know about this. If you any query feel free to ask us through comment section.

How to Unblock Someone on Snapchat – Step by Step Process

0

Snapchat is a multimedia application which is widely used across the globe for  image messaging. It is surely a nice way to get in touch with friends and family. At times few unwanted guests come around and spoil your mood that’s why Snapchat has given you the facility to block those people. Once you block a person, he or she will be removed from the friend list and won’t be able to send any message or Snap to you in future, infect that person won’t be able to see your story as well.

This is definitely a good option to keep someone away, but what if you block someone by mistake or decide to give a second chance to someone after a patch up? In order to get someone back in your friend list and allow him/her to communicate with you again, you need to know the process of unblocking people.

Remember, unlocking someone doesn’t mean that he/she would appear on your friend list automatically, they won’t even get a notification that you have unblocked them, but if they search for your account, it would be visible to them. Your friend needs to add you again so that you get the notification to add him back and that’s how both of you will get connected to each other once again.

Also Check :

How to Unblock Someone on Snapchat

Now see the steps given below to find out how to unblock a person on Snapchat, the process is similar for both Android and iOS.

  • First of all, tap on the Snapchat Ghost button which is located at the top of the Snapchat screen so that your Snapchat profile screen opens up

step1

  • Now, tap the Gear box button located at the upper-right corner to open the Snapchat settings.

snapchat ghost icon

  • Scroll down and tap Blocked under the Account Actions section. If the option doesn’t appear on your screen that means you are running an outdated version of Snapchat and you need to update the latest version first, you can do that from App Store of your respective device.

step3

  • Once you tap Blocked, it will show you the list of those people who have been blocked by you.step5
  • You need to find the name of the person and tap X which is located next to it.

snapchat unblocked

  • Once you click on X, it will ask you “Are you sure you want to unblock this Snapchatter”. Click on Yes and you are done unblocking the person.

So, these are the simple steps through which you can unblock a person on Snapchat. If you find any problem following these steps, you can let us know in the comments section below and we will try to figure out the problem.

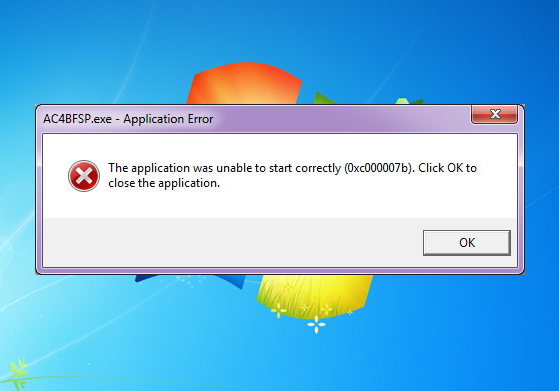
Fix error 0xc000007b “The Application Was Unable To Start Correctly”

error 0xc000007b

Windows is one of the most popular OS ( Operating System ) used today by several users. There are lot of versions available for the Windows. The most popular version of the window is Window 7.0. Some user switches to the newest version but still there are lot of people who is using the older version. There is one of the most common error “The application was unable to start correctly 0xc00007b” is faced by the all windows user. Today we are going to show you how to solve this error. how to fix application was unable to start correctly 0xc00007bBefore we get to the solutions of this error let’s take a look at the reason behind this error. There could be any reason of this error but we listed some of the most common reason for this error.

  1. The 32-bit app tries to execute on a 64-bit system.
  2. You might be trying to play a Game on your PC and after launching the application, error code 0xc00007b may flash on your screen.
  3. You might be launching software but unfortunately, the error code 0xc00007b may resist you to do so.
  4. There could be missing some .DLL files.
  5. Maybe you .NET framework version is Old.

Fix The Application Was Unable To Start Correctly 0xc00007b

Now you all new reason behind this error, so let’s get the solution for this error. You can try any one of them but we suggest you try only one method at a time and reboot your system and check. If it doesn’t work then try another. Now let’s take a look at the solution one by one.

Solution 1:- Reinstall Directx

This error could be because of the Directx. Now Directx is a set of low-level Application Programming Interfaces (APIs) that provides Windows programs with high-performance hardware-accelerated multimedia support. So it must be install properly with the latest version available. If you already install that and still facing The Application was unable to start correctly 0xc00007bm error then try reinstalling Directx, and follow these steps.reinstall directxStep 1. Download the latest version of Directx from here.

Step 2. Locate this file and now right click on that and run as administration.

Step 3. Now reboot your computer and check it if the problem is solved. If not then try the next method. 

Solution 2:- Reinstall .NET Framework

The error could be because of .Net framework. To get rid of this error you should try to install the latest .Net Framework version available on the Microsoft site. You can follow the given steps to Reinstall .Net Framework.reinstall .net frameworkStep 1. Download the latest version of .Net Framework forms here. 

Step 2. Locate that file and right click on that and run as administration.

Step 3. Now reboot your system and check if the problem is solved or not. If still you are facing 0xc000007b error then you can try the next method.

Solution 3:- DOWNLOAD DLL FILES

We noticed that this error accrues due to some missing DLL files. You can just download those files and place them on their locations. You can try this also to get rid of this error. All you need to follow some simple steps given below.Downlaod DLL

Step 1:- Download the following DLL files as mentioned below.

xinout1_1.dll
xinput1_2.dll
xinput1_3.dll
xinput1_4.dll
xinput9_1_0.dll

To download these file you can click here.

Step 2.  After the completion of the download, copy these DLL files in C:\Windows\SysWOW64. It may ask you to replace the files. In such a case, allow it to do that.

Reboot your PC. Now you won’t be getting error 0xc00007b.

Solution 4:- RUN YOUR APPLICATION AS ADMINISTRATOR:-

There is some certain software which requires administration permission. This may be the reason behind this error. By allowing them we can get rid of this problem. To do so you just need to follow the given steps.

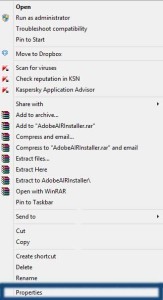
Step 1. Go to the application and right click on that.0xc00007b error

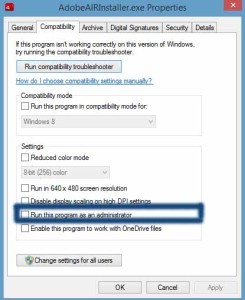
Step 2. Select the Properties option and a new window will appear.

Step 3. Now in this window you can see a lot of option, go to the compatibility section and select the “Run this program as administrator”. Click on the OK.how to fix 0xc00007b error

Reboot your system and start the program now you won’t get this error anymore.

These were some of the most effective and efficient methods to fix The application was unable to start correctly 0xc00007b error. Solution mention above is tested it won’t damage any of the other software. Let us know which method worked for you. Hope you liked this article on “How to Fix Error 0xc00007b”. Share it with you friend so they can also get to know about this solution. In the case of any queries regarding this, feel free to ask via comments.

Solve All Driver Related Issues with Driver Talent- The perfect Driver Fixer

0

Did you recently get some driver issues on your PC? Or you have just installed new Windows and you are unable to find the compatible driver for your device. This is very general problem with Windows systems. With the time and technology updates, you need to keep on updating your drivers also. It is really necessary to maintain a smooth relationship between your software and hardware.

And it’s very irritating to manually find the right drivers for your system. But now you do not need to do that. With Driver Talent, you can easily find, Download and update your Windows drivers.

It is the one click solution to all your driver related problem. It automatically finds out all missing, outdated, faulty and corrupt drivers. And then helps you to download and install the correct drivers.

Driver Talent – Download, Update, and Solve all Windows Driver Issues

Driver Talent is a program that helps you to download the correct drivers for your system. It maintains all your drivers, by scanning and finding all the outdated and faulty drivers. We have talked a lot about it. Let’s know more about its features.

Driver Talent Features

  • It is a one click solution to all your driver related problem.
  • You can scan your system to find out all outdated, missing and faulty drivers.
  • It automatically downloads the correct drivers for your system hardware.
  • It keeps all your drivers up to date with the latest updates.
  • With this, you can Backup, Restore, Uninstall, Reinstall your drivers.
  • It is compatible with all Windows versions Windows Vista, XP, 7, 8, 8.1, 10 and Windows Server.

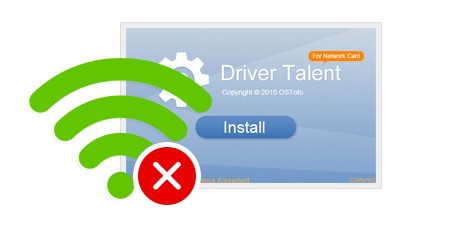
Driver Talent For Network Card

driver talent for network card

If you have installed a fresh Window on your system and after the install you find out that you can not connect to the internet, as your network card drivers are missing. With no internet, you can not even download your network drivers.

And most of the people don’t know which network card or adapter they have in their system. So you can try to download from another system.

Driver Talent for Network card is the best solution to this problem. With this, you can download and install the network drivers for any system without internet or offline. Yes, you do not need to have any connectivity to find the suitable drivers for your network adapter (both WiFi and Ethernet).

So just Download this on any PC which has internet, transfer and run it on your faulty PC. That’s it, all other worries to Driver Talent.

How to Use Driver Talent

First Download Driver Talent and install it on your PC. Then you need to run a simple Scan to find out the best-matched drivers for your system.

Download Driver Talent

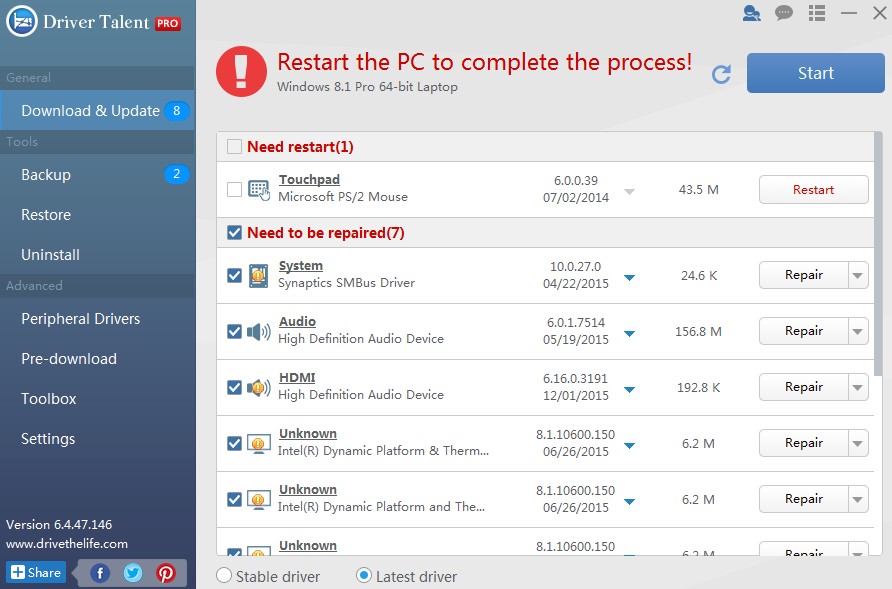
Download and Update

download and update

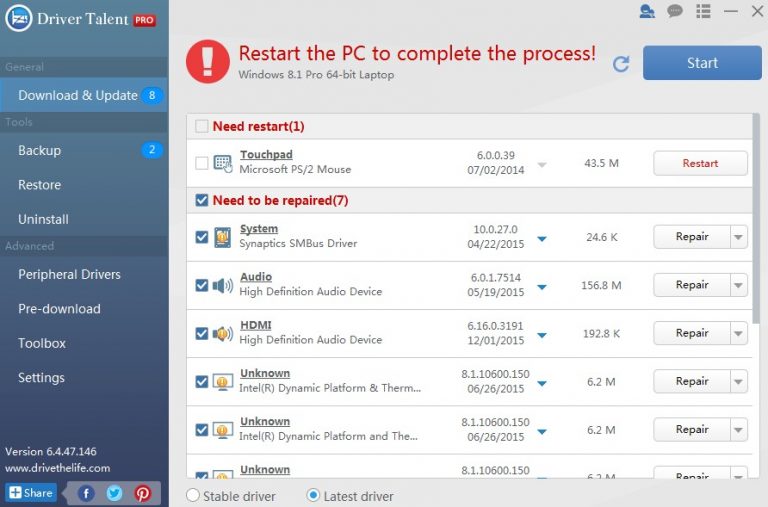
This option helps you to find out the missing and faulty drivers in your system. After a scan is complete, it lists out all that need to be repair and update. You can then click on repair button to download and install the correct driver.

Backup, Restore, and Uninstall

With this feature, you can create a backup of your drivers. So in future, if you have some issue, you can restore them. It will be the totally offline process. And with the uninstall feature, you can uninstall any driver without leaving any residual files.

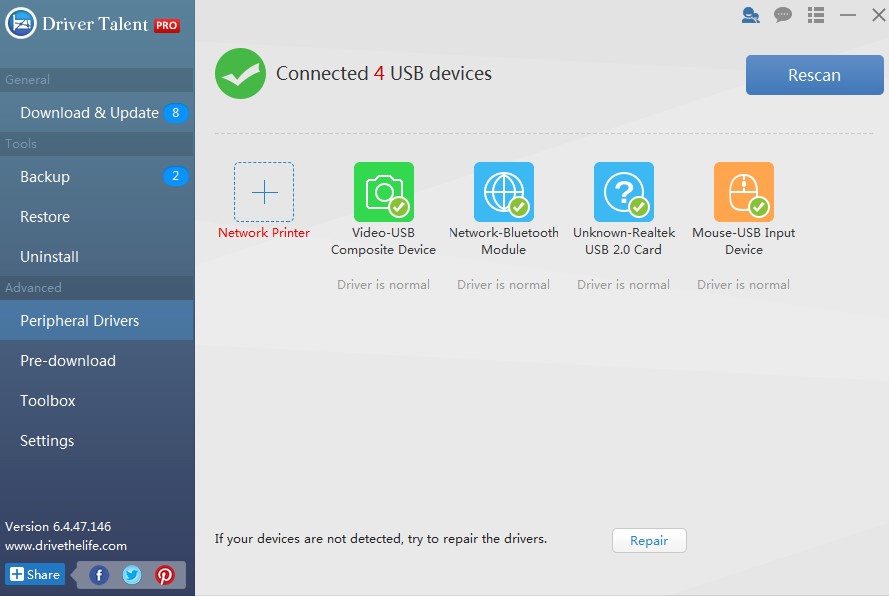
Peripheral Drivers

peripheral Drivers

This option helps you manage your peripheral drivers like USB Keyboard-Mouse drivers, Bluetooth, WLAN drivers etc. With this, you can easily download and install the network printer drivers. And in case, of the device not recognized, it will repair the driver.

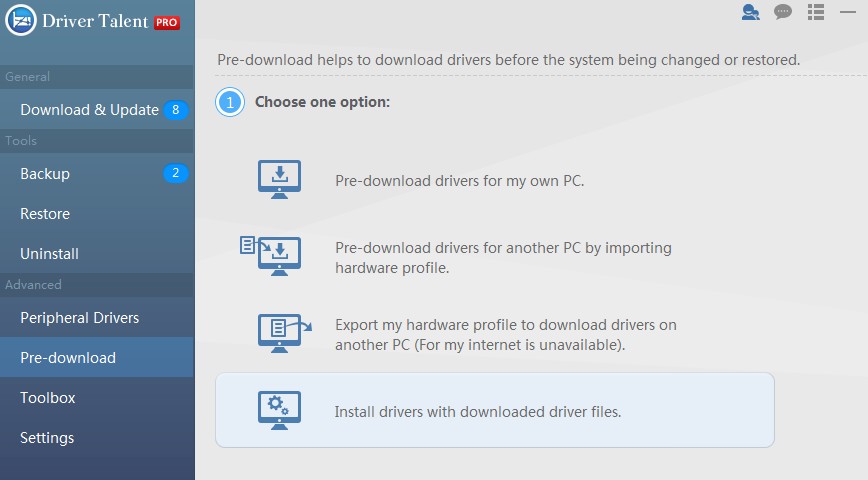
Pre-Download

pre download drivers

If you are going to do some major change to your systems like OS update or downgrade, format and system restore. So with this feature, you can pre-download all your drivers for safety purpose. You can even download the drivers for another PC by importing its hardware profile.

Or you can export your system hardware profile, so you can download drivers from another PC.

Toolbox

toolbox

There is one click option for PC Repair to fix issues with your Display, Audio and other drivers, Hardware detection to get complete information about all your hardware. And PC Speeder to speed up your PC and optimize its performance.

Driver Talent has the database of more than 500,000 driver packages, so you do not have to worry about drivers when you have driver talent installed in your system. You will get all types of drivers, whether it is graphic, motherboard or any other. And it supports all Windows from Vista to 10.

T-Mobile APN Settings (3G, 4G LTE) For iPhone, Android, Windows Mobile

0

T Mobile APN Settings is required if you need to run internet in your Mobile with carrier T Mobile. So here in this post i am sharing APN settings for TMobile. Now you can connect your phone easily to internet and this APN work for all Android, iPhone and Windows phone. And this will allow you to connect with all networks including T-Mobile 3G,4G, LTE etc.

t mobile

Also Check :

In general you do not need to download and enter the APN settings manually. As when you insert the SIM in your phone, it automatically fetches APN settings from your carrier. But sometime due to some issue, it does not get the right APN. This also happens when you try Unlocked phone with T-Mobiles. It does not comes with default settings. So you need to enter it yourself.

APN Settings for TMobile

If your phone does not fetch the APN, then here is the step by step configuration process for setting up APN on T-Mobile.

T-Mobile APN Settings For Android

To configure your Android phone with the latest T-Mobile APN settings follow the below steps.

  • First, go to Settings menu on your Android phone.
  • Now select Wireless and Network option.
  • Then Select the Mobile Network >> Access Point Name.
  • Now Tap on NEW APN option to add the new settings.

Now enter the APN settings given below :

T-Mobile APN Settings For Android Smartphones

  • Name: T-Mobile
  • APN: fast.t-mobile.com
  • Proxy: Leave Blank
  • Port: Leave Blank
  • Username: Leave Blank
  • Password: Leave Blank
  • Server: Leave Blank
  • MMSC: http://mms.msg.eng.t-mobile.com/mms/wapenc
  • MMS Proxy: Leave Blank
  • MMS port:Leave Blank
  • MCC: 310
  • MNC: 410
  • Authentication type: Leave Blank
  • APN type: default,mms,supl
  • APN protocol: IPv4

T-Mobile APN Settings For iPhone or iOS Devices

To Confiqure your iOS devices like iPhone, iPad with T-Mobile APN settings follow the steps.

  • First open the Settings Menu in your iPhone.
  • Now Go to General >> Network.
  • Now select Cellular Data Network.
  • Now Add the APN settings given below.

T-Mobile APN Settings for iPhone

  • Name: T-Mobile
  • APN: fast.t-mobile.com
  • Proxy: Leave Blank
  • Port: Leave Blank
  • Username: Leave Blank
  • Password: Leave Blank
  • Server: Leave Blank
  • MMSC: http://mms.msg.eng.t-mobile.com/mms/wapenc
  • MMS Proxy: Leave Blank
  • MMS port:Leave Blank
  • MCC: 310
  • MNC: 410
  • Authentication type: Leave Blank
  • APN type: default,mms,supl
  • APN protocol: IPv4

T-Mobile APN Settings For Windows Phone or Tablet

To Configure your Windows devices like Windows Phone and Tablet with AT&T APN settings follow the steps.

  • First Go to the Settings Menu in your Windows Phone.
  • Now Tap on Mobile Network >> Add APN

Add the APN settings given below.

T-Mobile APN Settings for Windows Phone

  • APN: fast.t-mobile.com
  • Proxy Server: Not set
  • Proxy Port: Not set
  • Username: Not set
  • Password: Not set
  • APN protocol: IPv4

Just Save this settings and try to run internet now. You will be able to easily access internet dat on your unlocked phone with T – Mobile.

If you still have any problem in setting up T-Mobile APN settings on your Android, iPhone or Windows Phone. You can post your queries in comment section below.

How to delete Snapchat Account, History, Story and Friends

0

In such a small time Sanpchat has become one of the most popular Chatting apps. It should be because of the unique feature it has. This application is known for its impermanent nature. Messages, images, and videos will vanish everlastingly a few seconds after the receiver see them. We can say it is the app who delete its data by its self. The term “Snap” contains messages, images, videos, and other like clipart and all will delete after a set time.

how to delete snapchat account on iphone
Today we are going to talk about the all you can do in snapchat like How to create snapchat account, How to delete snapchat account and there is a lot more we can do in snapchat like delete a snapchat story, delete snapchat history, block friends on snapchat. We will discuss all that also.

How to delete your Snapchat Account

Now Snapchat has millions of account and it still growing day by day. Recently someone leaked more than  4 million Snapchat usernames and phone numbers due to a security breach. Now some users are interested in leaving the snapchat service for good. So today here we are going to tell you how to delete snapchat account on IPhone. Now there is two way to do it, we are going to tell you both step by step:-

Step 1: Open the Snapchat app on IPhone, login and tap the Settings icon in the upper right corner.how to delete snapchat account

Step 2: Navigate to Support >> Learning the Basics >> Delete an account.

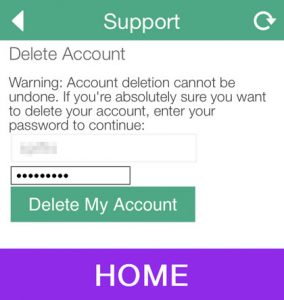
Step 3: Enter your Snapchat password.

delete snapchat accountStep 4:Tap the Delete My Account button to close the account.

That was the first one, here is another one also takes a look:-

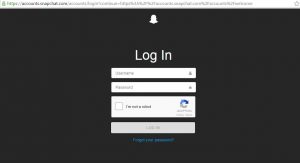
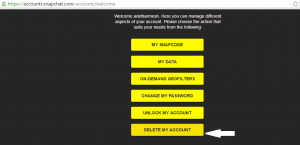
Step 1: Fallow this  https://accounts.snapchat.com/ from any browser (you can’t delete the account from the actual app).

Step 2: Enter your username and password.

delete snapchatStep 3: Check the box to confirm you are not a robot and login.

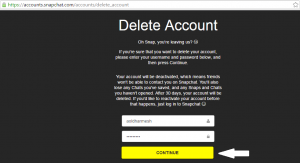
Step 4: Now at the bottom, you’ll see “Delete my account”. Tap on that.

delete snapchat account on iphoneStep 5: Enter your username and password once again.how to delete snapchat account

Step 6: You are done now.  Snapchat will keep all your data for next 30 days, just in case you change your mind and want to return. So you can activate your account.

How To Clear Snapchat Cache On iPhone :

In case if you want to delete Snapchat cache on IPhone then here is the step by step guide:-

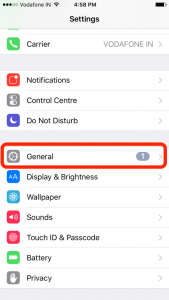
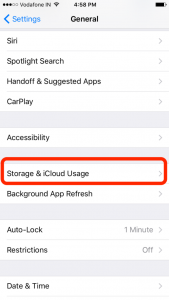
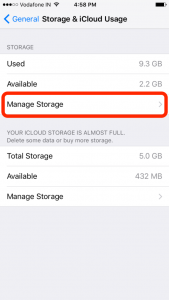
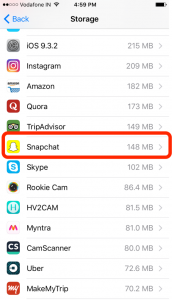
Step 1: Open “Settings >> General  >> Storage & iCloud >>Manage Storage and search for Snapchat.

clear cache in iphone how to clear cache in iphone

Step 2: Tap on Documents & Data to know how much space is taking. This is the cache storage of the stories and pictures that are being exchanged on Snapchat by you.

how to delete cache in iphone delete cache on iphone

Step 3: Let’s take a look how you can delete the Snapchat app for permanently. You will see Delete App option bottom of the Document & Data. Tap on that and it will delete the snapchat app for permanently. You can reinstall it from SnapChat App for iOS, in case you need.

How To Block and Delete Friend On SnapChat iPhone

Snapchat starts for a fun way so friends can also fun on iPhone, but there are some friends who didn’t know when to stop. All thanks to snapchat they have an option like BLOCK. Now you can block any friend who is bothering you. To block friend on snapchat iPhone please follow step by step guide:-

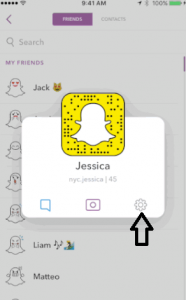
Step 1: Tap on the “Setting icon” on the upper right corner.block friend on snapchat

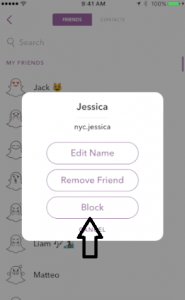
Step 2: Now go to friends and select that one, to whom you want to block and a pop will come up now you’ll see three options like “Edit name, Remove, and Block”.

how to block friend

Step 3: Tap on “Block” and a new pop up come for confirmation after that your friend will not be able to massage you. how to block friend on snapchat

If you want to unblock your friend:-

Step 1: Tap on the setting option on the upper right corner and then tap and scroll down to ‘Account Actions’ and tap ‘Blocked‘.

Step 2: You should see a list of friends who are currently blocked by you. Simply tap the next to their name to unblock them.

How to Delete Your Stories in SnapChat

Now i will how you how you can delete any story in iPhone. There is some simple steps you have to follow:-

Step 1: Now open the Snapchat App in your iPhone and swipe Left to Right to open the your stories.

delete story in snapchat

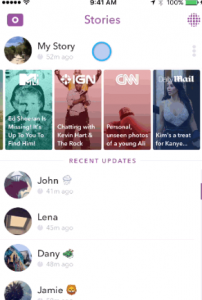
Step 2: Tap on My Stroy, after tapping in that it shows you a drop menu again tap on that now you see a “X” Button on the left.

how to delete story in iphone

Step 3: Tap on that and your all snapchat story will be deleted.

Conclusion

Now you know how to delete the Snapchat account on IPhone and how to clear snapchat cache on IPhone, So enjoy it let another know. Don’t forget to subscribe and share it. In case if you have any queries feel free to ask through comment. We will love to help you.

How To Block Websites On Google Chrome and Firefox

There is some site on the internet which you always open whenever you do surfing. So, you can’t focus on your work you want to do. Or being parent or guardian, you don’t want your child to surf any adult website. Today we are here to help you to stay focused on the web. There is a lot of methods which can help you to stay focus. In this tutorial, we will tell you about some add-on that can help you stay focused when using the web and doing your work.how to block websites on chrome and firefox

Everyone will agree with that when on the web we always access Facebook, Tweeter, and many other sites like that. With the help of these tools,you can block sites of our interest, just within your browsers. This add-on is available for both Google Chrome and Mozilla Firefox users.

How To Block Websites On Google Chrome and Firefox

Now let’s take a look at the add-ons which can help you to block sites.

Block Site Add-on for Chrome

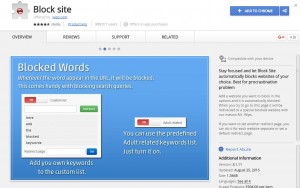
Block site Add-on is one of the best Add-ons to block sites. This is available for Google Chrome and it is also free to use and install. To use this add-on you just need to follow the given steps:-

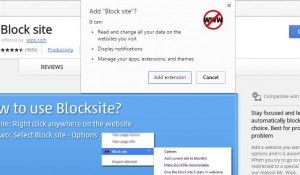
Step 1:- Install the Block Site Add-on on your chrome browser. Click on the “Add to Chrome” and a pop-up will appear; now click on “Add Extention”. Block SIte Add-on

block sites on chrome

Step 2:- After the completion of the installation process we can block any site you want. To do so you have to open the site you want to block. For example, you want to block facebook. Now right click on anywhere on the page and you can see the “Block site” option take your mouse pointer on that and click on the “Add current site to Blacklist”how to block websites on google chrome

After clicking on the option that will block. Now no one access that site.

Whenever you enter the blocked URL, you see some interesting and funny messages. One of them below. OR You can set it to be redirected to another web page in Preferences.
how to block sites on chrome


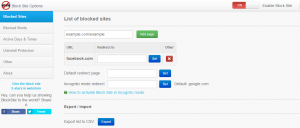
Step 3:– To remove the block site from the blacklist, right click and got to “Block Site > option ” and a new tab will open.block websites chrome

Block Site Add-on for Mozilla Firefox

This is the same add-on available for Mozilla Firefox also. Now let’s take a look how it works.

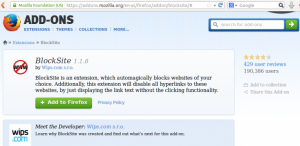
Step 1:- Open Mozilla Firefox and install the Block Site add-on.

Block site add-on for firefox

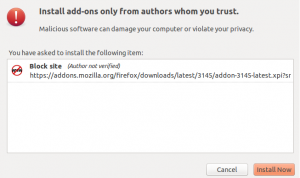
Step 2:- Now click on add to Firefox and a popup will appear now click on the “Install now”.how to block a website on mozilla firefox

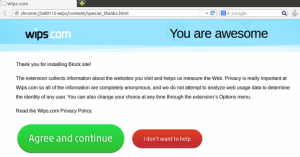
Step 3:- Restart the Firefox and a confirmation message will appear, click on the “Agree and continue” message now you this add-on ready to block any site.block a website on mozilla

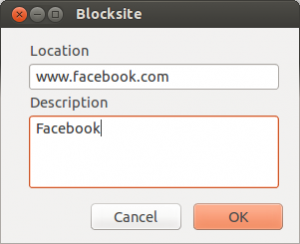
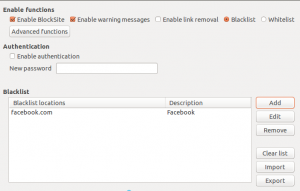
Step 4:- To block any site you have to add the site to the black site list. To “add Select Tools > Add-ons (On the Menu bar)” click “Preferences” below Block sites Add-on Select Blacklist from the top, the click Add to add a site.block site on mozilla

Click on Ok, now your site will block for further changes.

how to block sites on firefox

Step 5:- Now whenever anyone try to open the block site a notification will appear like this.

Blocked site

Step 6:- If you want to remove your block site the repeat the step 4 and this time click on site and after that click on the remove option. So, now you can access that site without any problem.

These are the best Add-ons to block any site, there are more like them but we highly recommend you to use them. You can share this article with your friends so they will also know about these add-ons and block any site they want. If you are using any other method to block site them please share with us through comment section we will love to add them.