

Did you recently get some driver issues on your PC? Or you have just installed new Windows and you are unable to find the compatible driver for your device. This is very general problem with Windows systems. With the time and technology updates, you need to keep on updating your drivers also. It is really necessary to maintain a smooth relationship between your software and hardware.
And it’s very irritating to manually find the right drivers for your system. But now you do not need to do that. With Driver Talent, you can easily find, Download and update your Windows drivers.
It is the one click solution to all your driver related problem. It automatically finds out all missing, outdated, faulty and corrupt drivers. And then helps you to download and install the correct drivers.
Driver Talent – Download, Update, and Solve all Windows Driver Issues
Driver Talent is a program that helps you to download the correct drivers for your system. It maintains all your drivers, by scanning and finding all the outdated and faulty drivers. We have talked a lot about it. Let’s know more about its features.
Driver Talent Features
- It is a one click solution to all your driver related problem.
- You can scan your system to find out all outdated, missing and faulty drivers.
- It automatically downloads the correct drivers for your system hardware.
- It keeps all your drivers up to date with the latest updates.
- With this, you can Backup, Restore, Uninstall, Reinstall your drivers.
- It is compatible with all Windows versions Windows Vista, XP, 7, 8, 8.1, 10 and Windows Server.
Driver Talent For Network Card
If you have installed a fresh Window on your system and after the install you find out that you can not connect to the internet, as your network card drivers are missing. With no internet, you can not even download your network drivers.
And most of the people don’t know which network card or adapter they have in their system. So you can try to download from another system.
Driver Talent for Network card is the best solution to this problem. With this, you can download and install the network drivers for any system without internet or offline. Yes, you do not need to have any connectivity to find the suitable drivers for your network adapter (both WiFi and Ethernet).
So just Download this on any PC which has internet, transfer and run it on your faulty PC. That’s it, all other worries to Driver Talent.
How to Use Driver Talent
First Download Driver Talent and install it on your PC. Then you need to run a simple Scan to find out the best-matched drivers for your system.
Download and Update
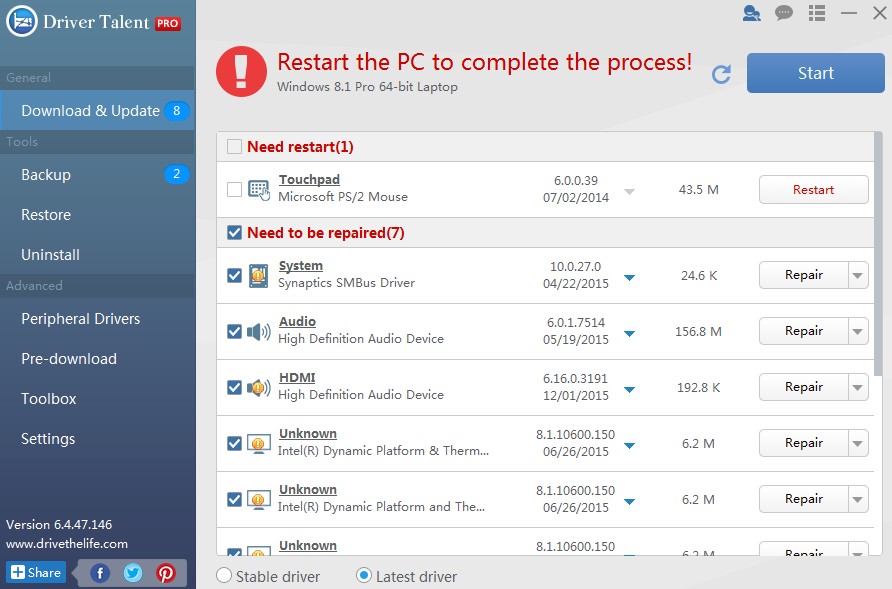
This option helps you to find out the missing and faulty drivers in your system. After a scan is complete, it lists out all that need to be repair and update. You can then click on repair button to download and install the correct driver.
Backup, Restore, and Uninstall
With this feature, you can create a backup of your drivers. So in future, if you have some issue, you can restore them. It will be the totally offline process. And with the uninstall feature, you can uninstall any driver without leaving any residual files.
Peripheral Drivers
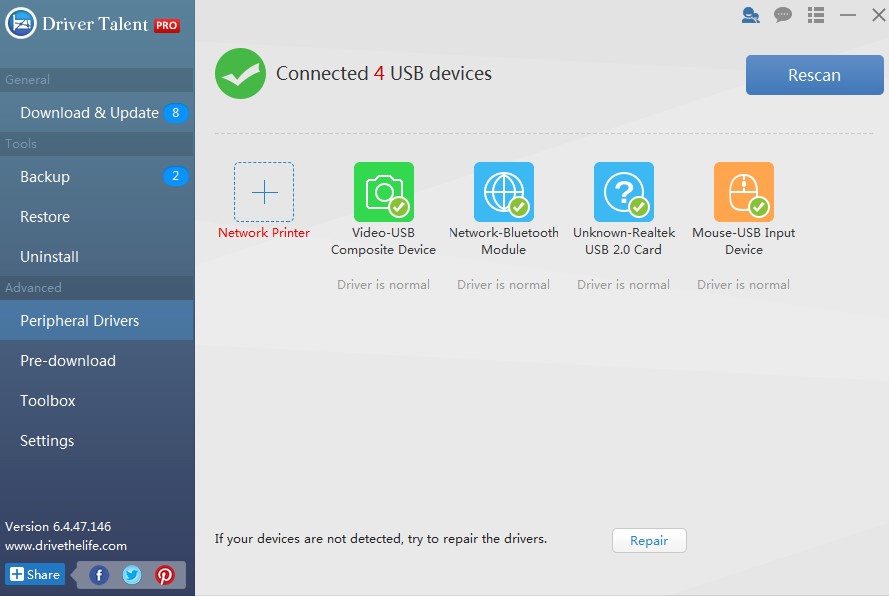
This option helps you manage your peripheral drivers like USB Keyboard-Mouse drivers, Bluetooth, WLAN drivers etc. With this, you can easily download and install the network printer drivers. And in case, of the device not recognized, it will repair the driver.
Pre-Download
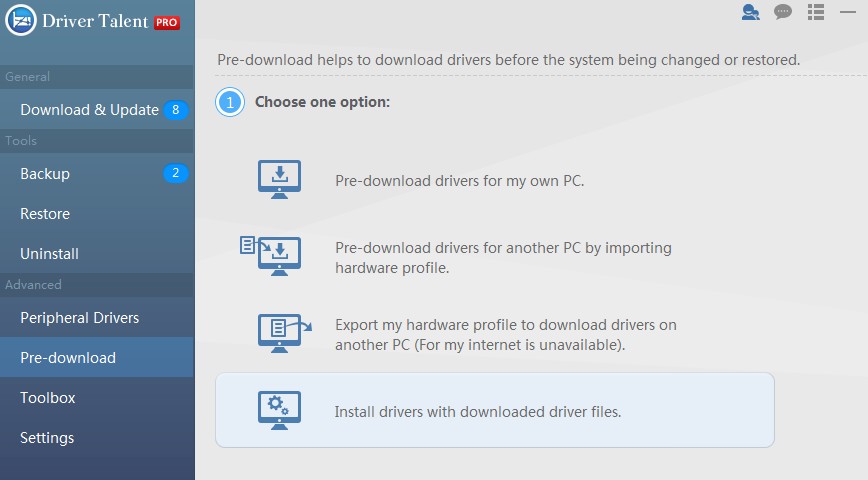
If you are going to do some major change to your systems like OS update or downgrade, format and system restore. So with this feature, you can pre-download all your drivers for safety purpose. You can even download the drivers for another PC by importing its hardware profile.
Or you can export your system hardware profile, so you can download drivers from another PC.
Toolbox
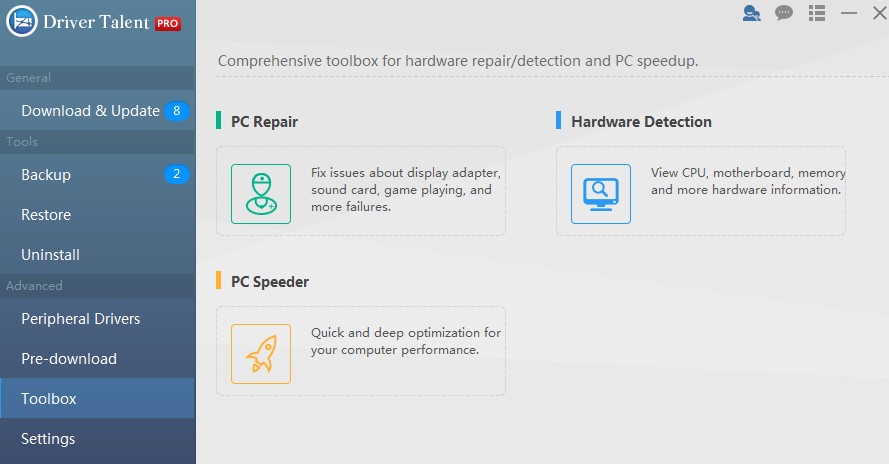
There is one click option for PC Repair to fix issues with your Display, Audio and other drivers, Hardware detection to get complete information about all your hardware. And PC Speeder to speed up your PC and optimize its performance.
Driver Talent has the database of more than 500,000 driver packages, so you do not have to worry about drivers when you have driver talent installed in your system. You will get all types of drivers, whether it is graphic, motherboard or any other. And it supports all Windows from Vista to 10.
 For iPhone, Android, Windows Mobile")


